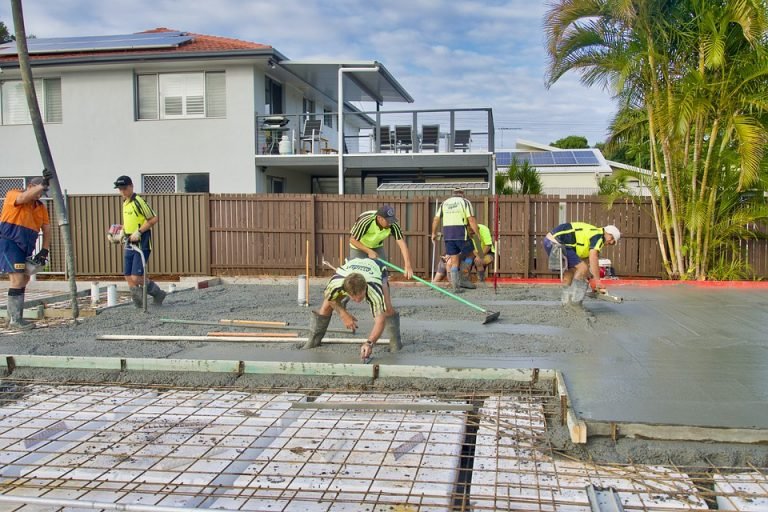
Complex and large-scale project contractors need to work with a professional supplier to acquire and layout concrete slabs. However, for a DIY project, it is not at all necessary. If you are working on a small reconstruction or a self-built patio, you can always put your muscles to use and carry out the concrete mix laying yourself.
This will help you save money on professional services and labor. Not to mention that for do-it-yourselfers, concrete pouring is as rewarding as it is challenging.
The ready-mixed concrete is one of the best materials for DIY jobs. All you have to do is hire a reputable concrete supplier, and they will deliver the mix directly to your desired location, which is then poured into a wood form and left to cure.
From DIY renovations to self-built patios, the most suitable building material for small projects is ready to mix concrete regardless of the construction type.
Working with concrete for the first time may seem daunting, but with the proper technique, you will achieve optimal results with minimal effort. This comprehensive guide will take you through six essential steps of laying a concrete slab.
From tools you need for ground preparation to maintaining the poured concrete, we have covered it all. Continue reading to learn how to do DIY concrete mix projects like an expert.
What Is The Right Time To Pour A Concrete Slab?
Ideally, your concrete slab should be poured in dry, warm weather. You can pour the concrete on colder days when the temperature is between 50—70° F. However, while pouring concrete in cold weather, you may have to take extra precautions, and the curing time may extend from five days to seven days.
Safety Considerations
When working on a construction site, it is imperative to abide by some safety and health guidelines, which may vary from project to project. Some safety practices to follow while working with concrete include:
- Protect your eyes with protective glasses.
- Concrete mix can irritate breathing passages and lungs; covering your nose with a mask is essential.
- Always wear safety boots and protective gloves while working on a construction project, regardless of what materials you are using.
- Concrete bags can be hefty, avoid lifting them or do so with precaution.
Equipment And Materials You Will Need
- Equipment/Tools
- Hammer, Shovel, Tamper
- Level
- Concrete hand float
- Mixing hoe
- Wheelbarrow, Buckets
- Measuring tape
Materials
- Bags or patch of ready-mix concrete – As per your project requirements.
- All-purpose gravel.
- Wood stakes.
- Deck screws.
- Twine or mason’s line.
- Galvanized nails.
- Vegetable oil or release agent.
Step By Step Procedure For Laying A Concrete Slab
Step 1 – Ground Preparation
The first and foremost step of the concrete laying procedure is to clean the area of any objects that can lead to cracking or frost.
With the help of small equipment, remove objects like old vegetation, trees, rocks, and old concrete until the bare earth is uncovered. You can also utilize earth-moving equipment to speed up the process.
Step 2 – Build Up A Base
A firm base is essential for yielding a perfect concrete slab. Unless the site has sandy soil, you must lay out a layer of gravel before pouring concrete.
After setting a base, the next step is to set forms. Wood forms with wood/metal stakes would be ideal for DIY projects. To make it easier to remove the forms after the concrete has hardened, use screws or unique nails to secure them to the stakes.
Forms should be in good shape, allow appropriate drainage slope, and have clean corners where they meet each other or other structures.
Step 3 – Strengthen The Base With Steel Bars
For extra strength and enhanced crack resistance, you can add steel bars to your concrete base. You may have to pay an additional cost for wireframes, but your concrete’s strength and durability will make the investment worth it.
Step 4 – Preparation For Concrete Truck
If you are using pre-prepared bags of Mixed concrete, you can skip this step. However, if your concrete will be delivered by a concrete pump or truck, you should ensure that everything is ready before it arrives.
Also, check whether the forms and wire bars are placed straight and firmly. If possible, avoid concrete pouring on a windy day.
Step 5 – Pour And Flatten The Concrete
The next and final step is to pour the concrete mix into the forms until the top edge. While pouring the concrete, you should ensure that all the gaps are filled appropriately, leaving no voids or air pockets.
You can use a metal or wood board to screed the concrete for a smooth and leveled finish. Next, you should utilize floats for edges and detailing and other special hand tools to flatten the concrete at early stages.
Step 6 – Trowelling
The additional water will drain out of the solid, and the Mixed concrete will be set on the surface once you have leveled the concrete slab with floats and other tools. Before you continue wrapping up, wait for the water to evaporate and the concrete surface to get solid.
Once your concrete gets enough strength to withstand a thumbprint, you should begin floating and trowelling to concrete. Next, you should apply to cure and seal compounds to help them fix evenly.
Concluding Note!
Ready-mixed concrete is a widely used construction material and is an excellent choice for your small projects. You can carry out your concrete undertakings seamlessly and achieve optimal results with the proper technique and tools.
We hope that you find this comprehensive guide is helpful for your DIY-ready mix concrete projects. Also, for more information on ready mixed concrete acquisition and delivery, contact your nearest concrete supplier today.


